Safer Riding Begins with a Brake System Check
May 10, 2023
Tips & how-to guides
There’s a lot at stake every time you swing a leg over a motorbike, so to ensure a safer ride, it’s vital that owners undertake regular braking system checks.
Disc brakes are a combination of mechanical, hydraulic and consumable parts, and failure in just one of these areas will lead to trouble. The good news is that brakes are easy to inspect, all that’s needed is a few minutes of time and a torch.

Bike brake tests are quite easy to perform, all that's needed is a torch, a few minutes and bit of knowledge.
Pad Check
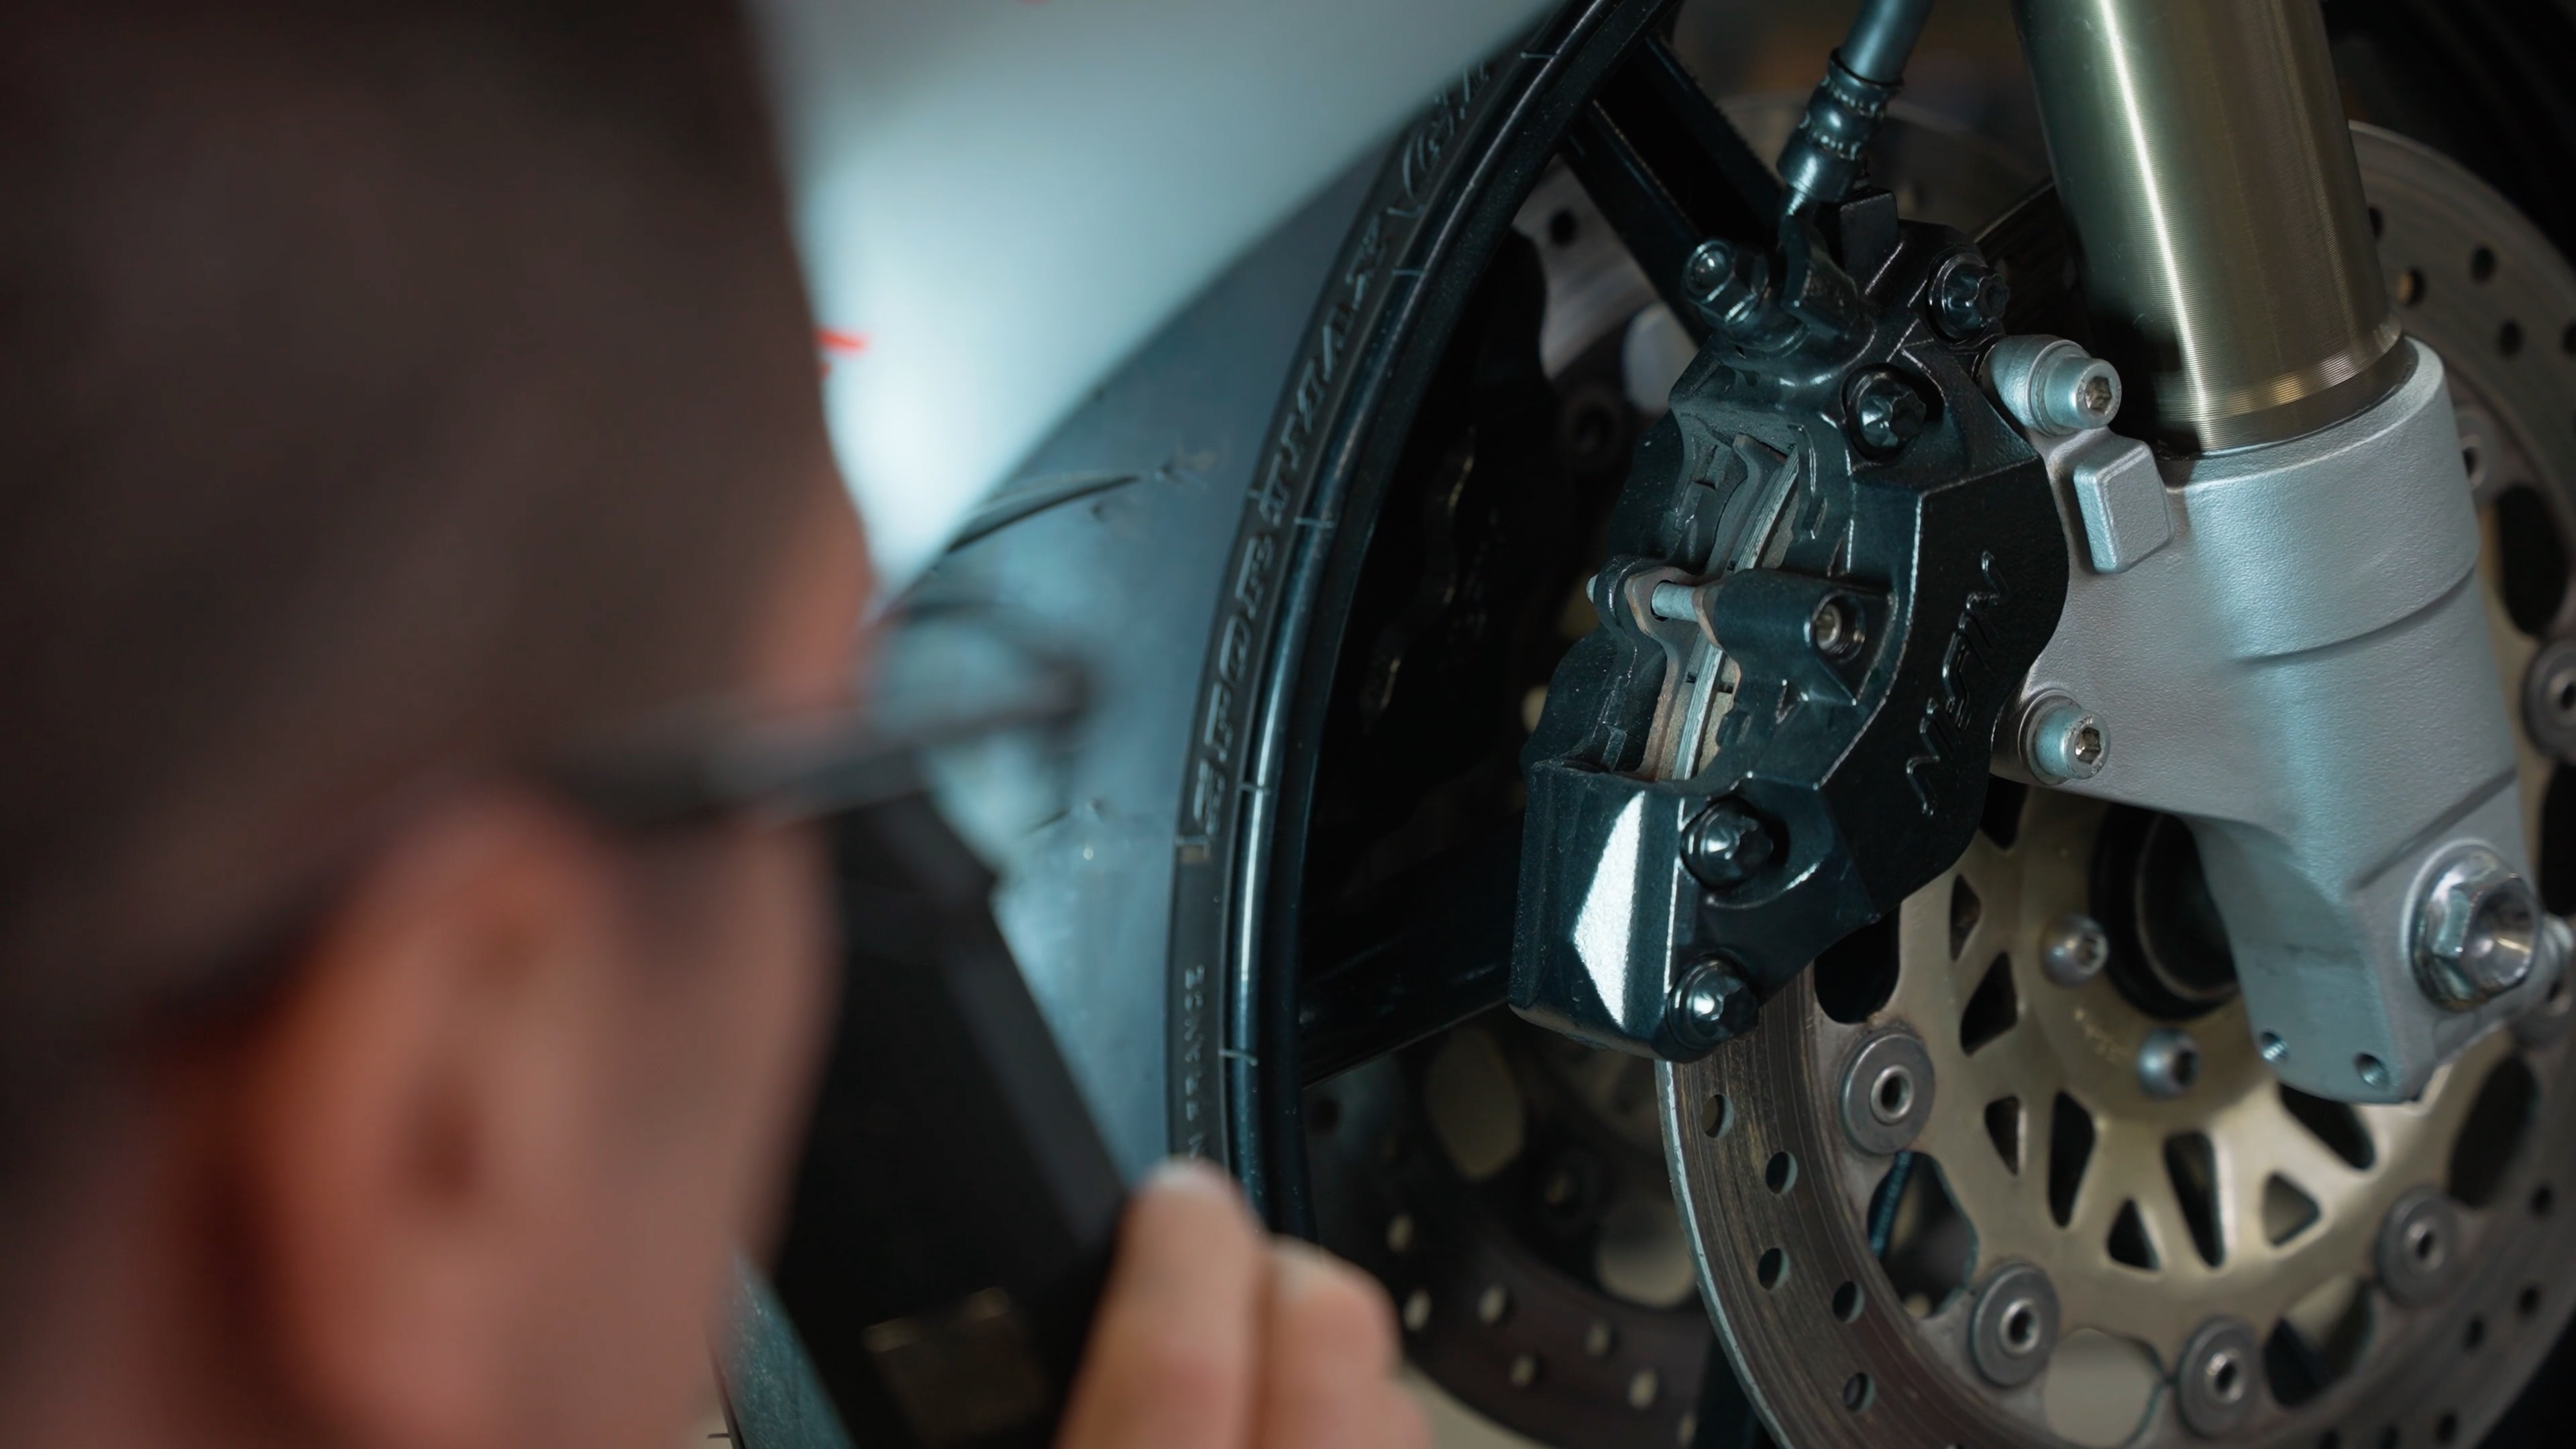
Depending on the motorbike, you may have an inspection cover on the top of the caliper, or need some maneuvering to find the best view of the pads. Either way, shine the torch into the caliper to see how much friction material remains – there should be around 1.5 to 2mm as a bare minimum.
Pads feature wear groves and when the friction material is worn enough for the grooves to almost disappear, it’s time for a change.
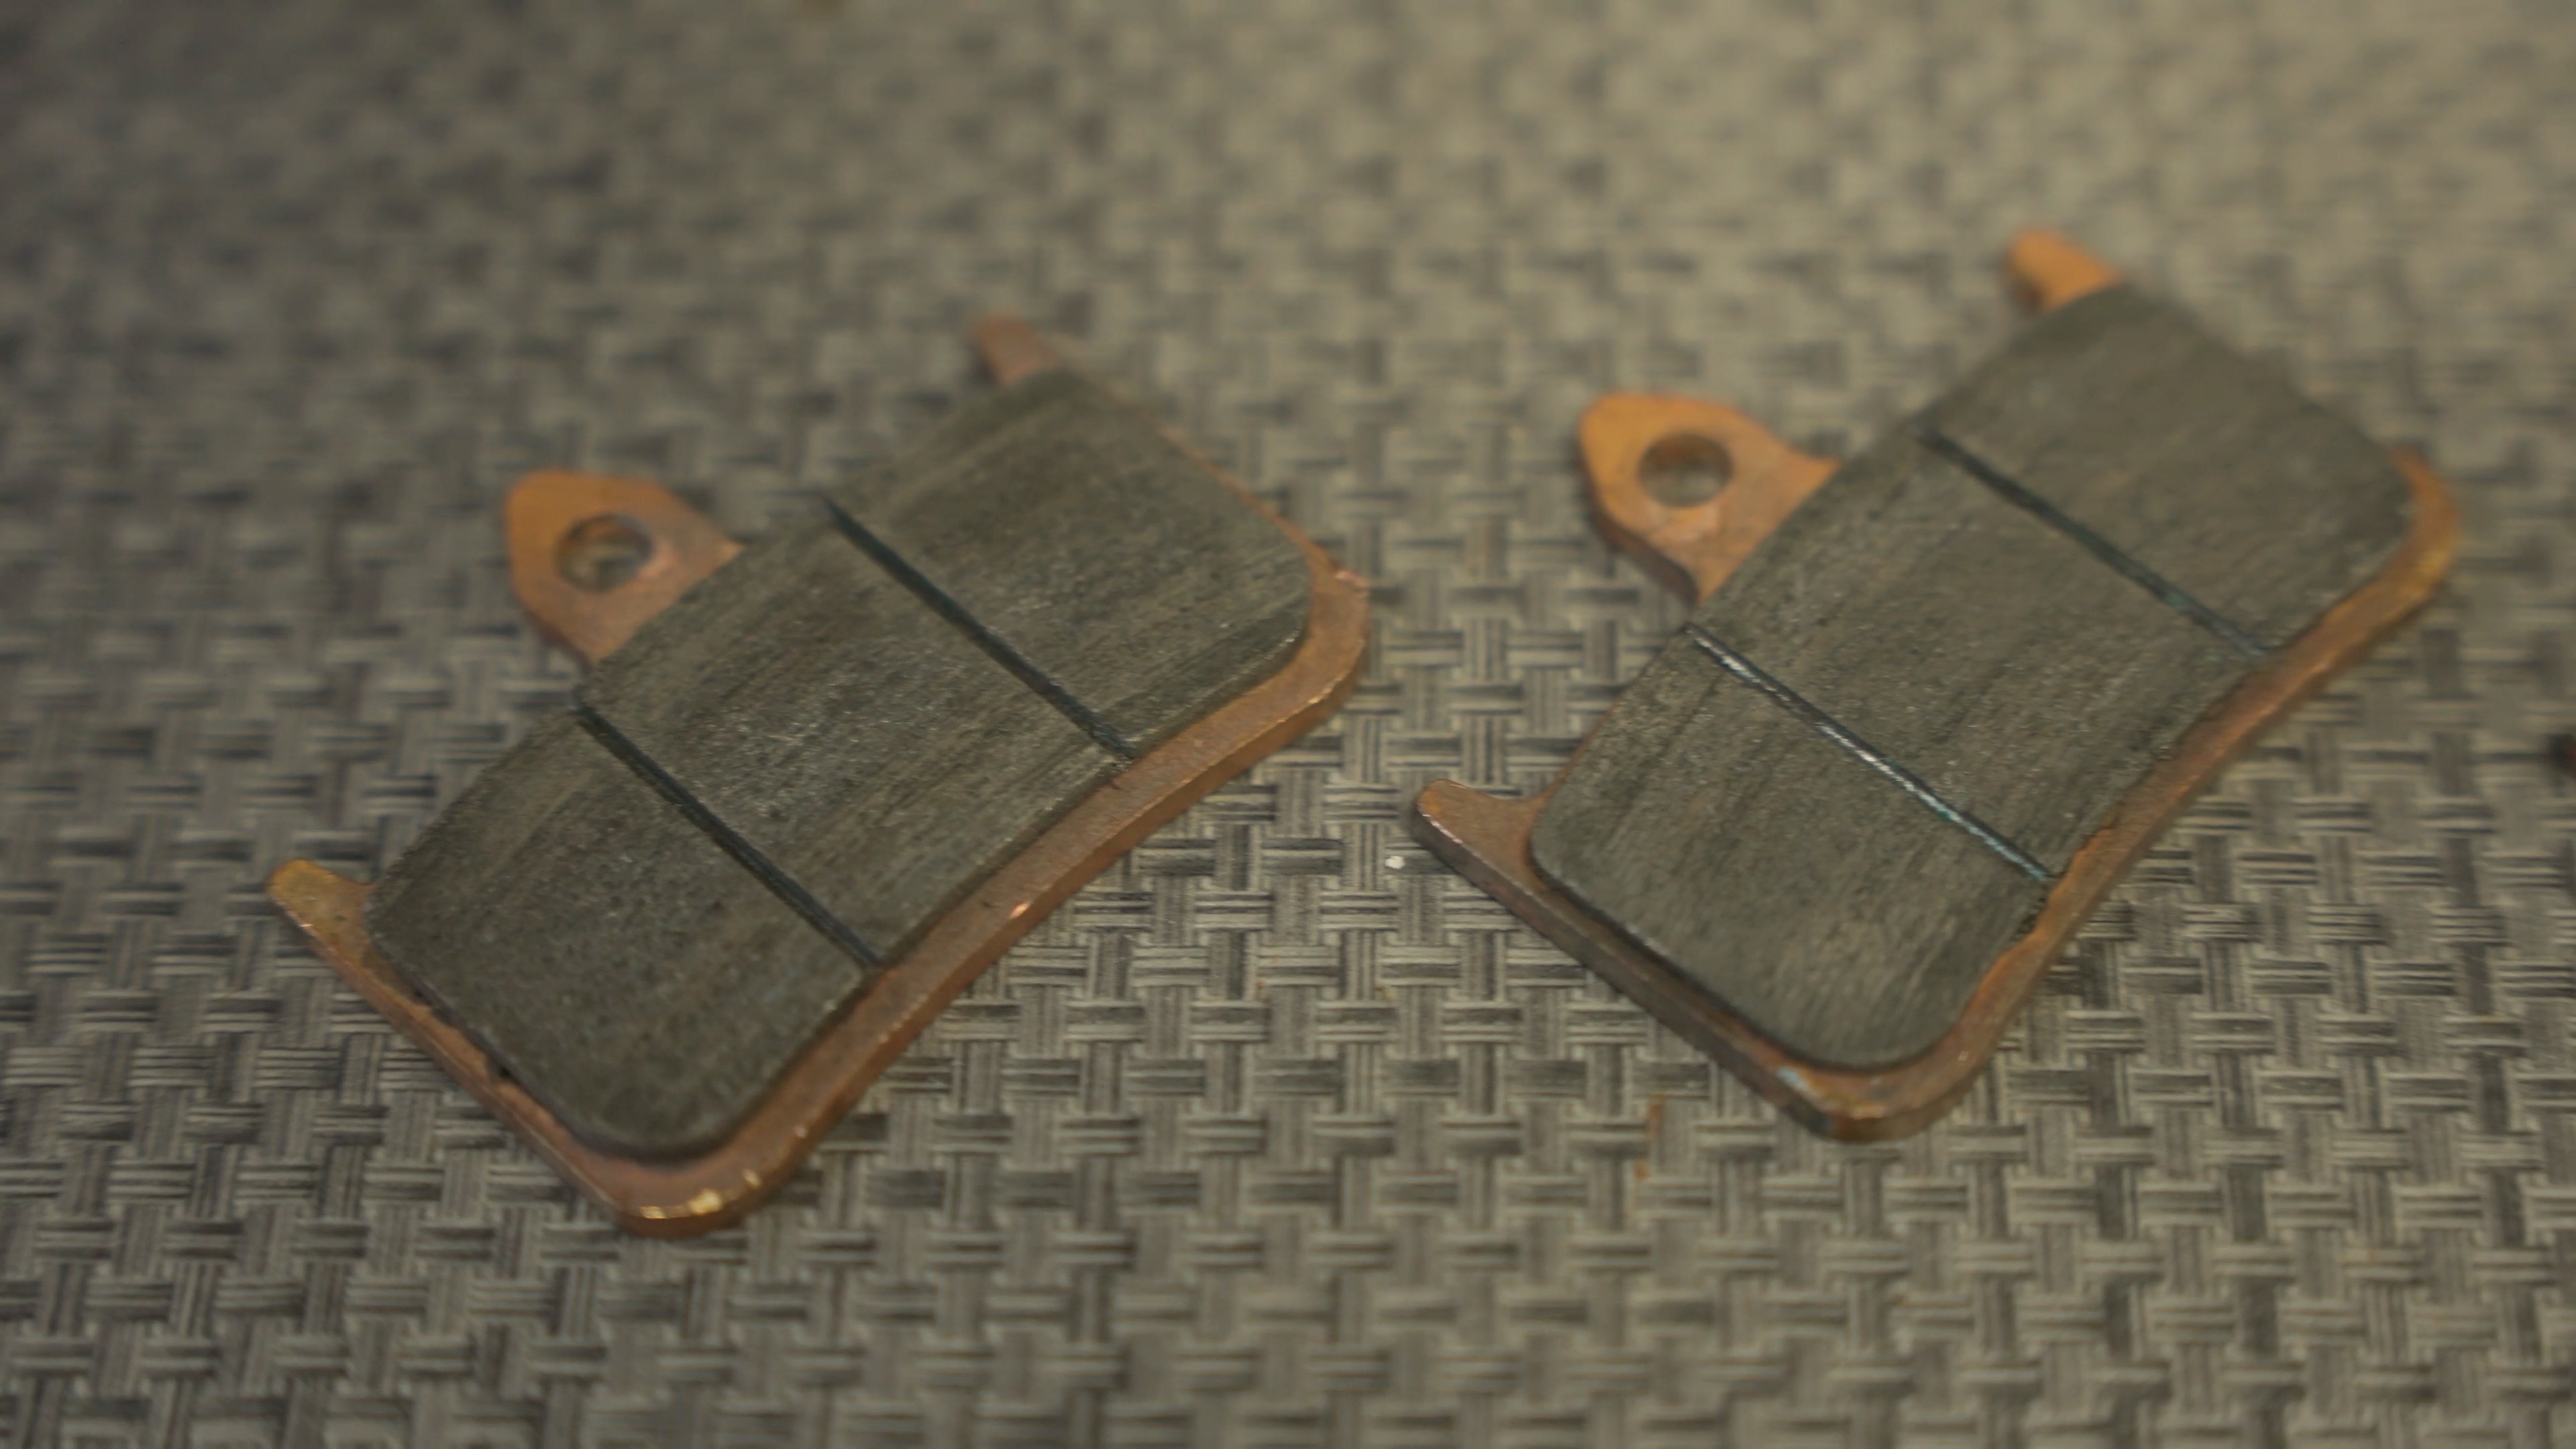
There should be a minimum of 1.5 to 2mm of friction material on pads as a minimum - check the wear grooves.
The Bendix Moto Pad Range
When pads do need replacing, Bendix Moto makes choosing easy, offering two types of brake pads. For commuters, scooters lightweight or classic bikes, Bendix Ultimate Plus ceramic pads deliver low dust, noise and wear performance while still offering increased feel at moderate speeds.
Heavy duty cruisers, tourers, sports and dirt bikes need Bendix Street Road Track (SRT) pads. These sinter pads can handle wet, dry, hot, cold or muddy conditions.
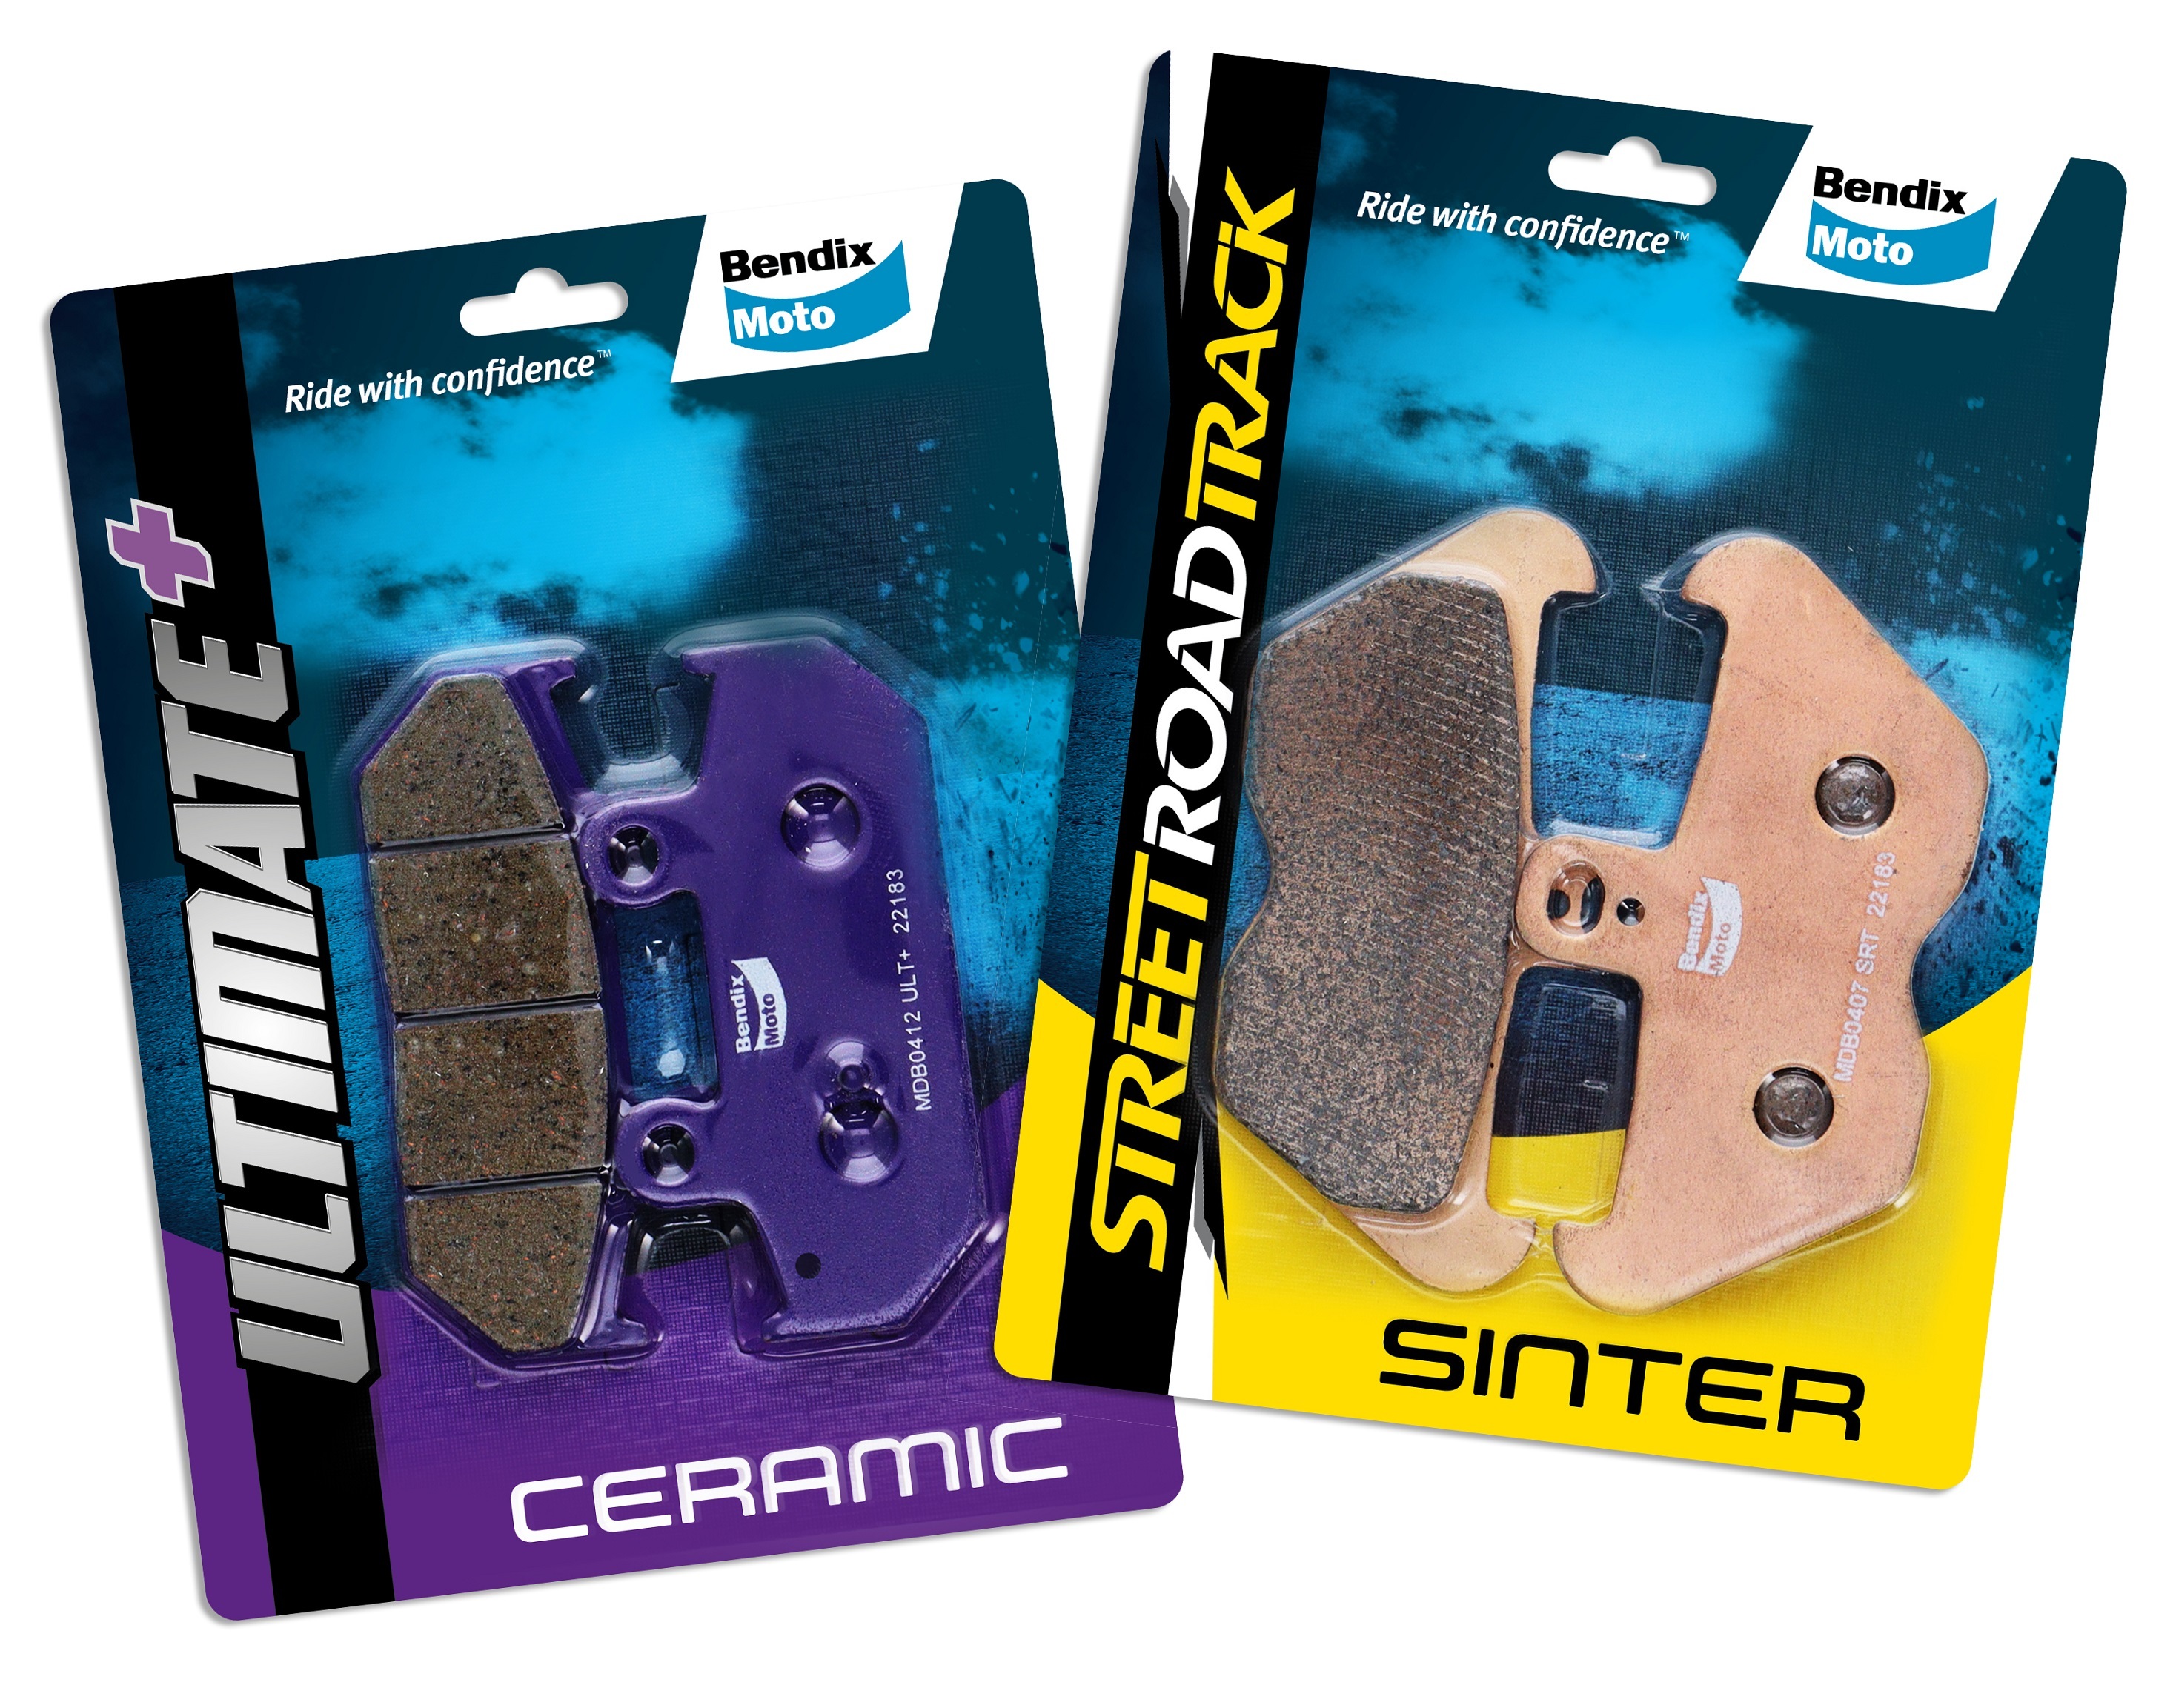
The Bendix Moto pad range includes Bendix Ultimate Plus and Bendix Street Road Track (SRT).
Uneven Pad Wear
If you’ve noticed uneven wear on the brake pads, chances are the brake pistons may be sticking or are seized. To inspect, you’ll need to lift the wheel you’re checking off the ground, then with one hand spin the wheel and apply the brake – the wheel should stop immediately. Next, straight after, spin the wheel again, if you feel any resistance from the wheel or if it won’t move at all, there’s a problem with the brake pistons. Servicing the brake caliper pistons is a job that’s best left to a trained mechanic.
By lifting each wheel, spinning and applying the brake before releasing it and spinning the wheel again, a rider can judge if the brakes are dragging
Disc Rotor Checks
The best pads in the world are only as good as the disc rotor they grab a hold of, so regular inspection is also necessary. First, run your finger across the disc from the centre outward. If the surface has ridges or a lip on the inner or outer edge of the disc, the brake performance is compromised.
Years of use can also warp a brake rotor. You can feel the oscillation from a warped disc through the brake lever. If the rotor shows signs of scoring or warping, consult a mechanic to have it replaced.
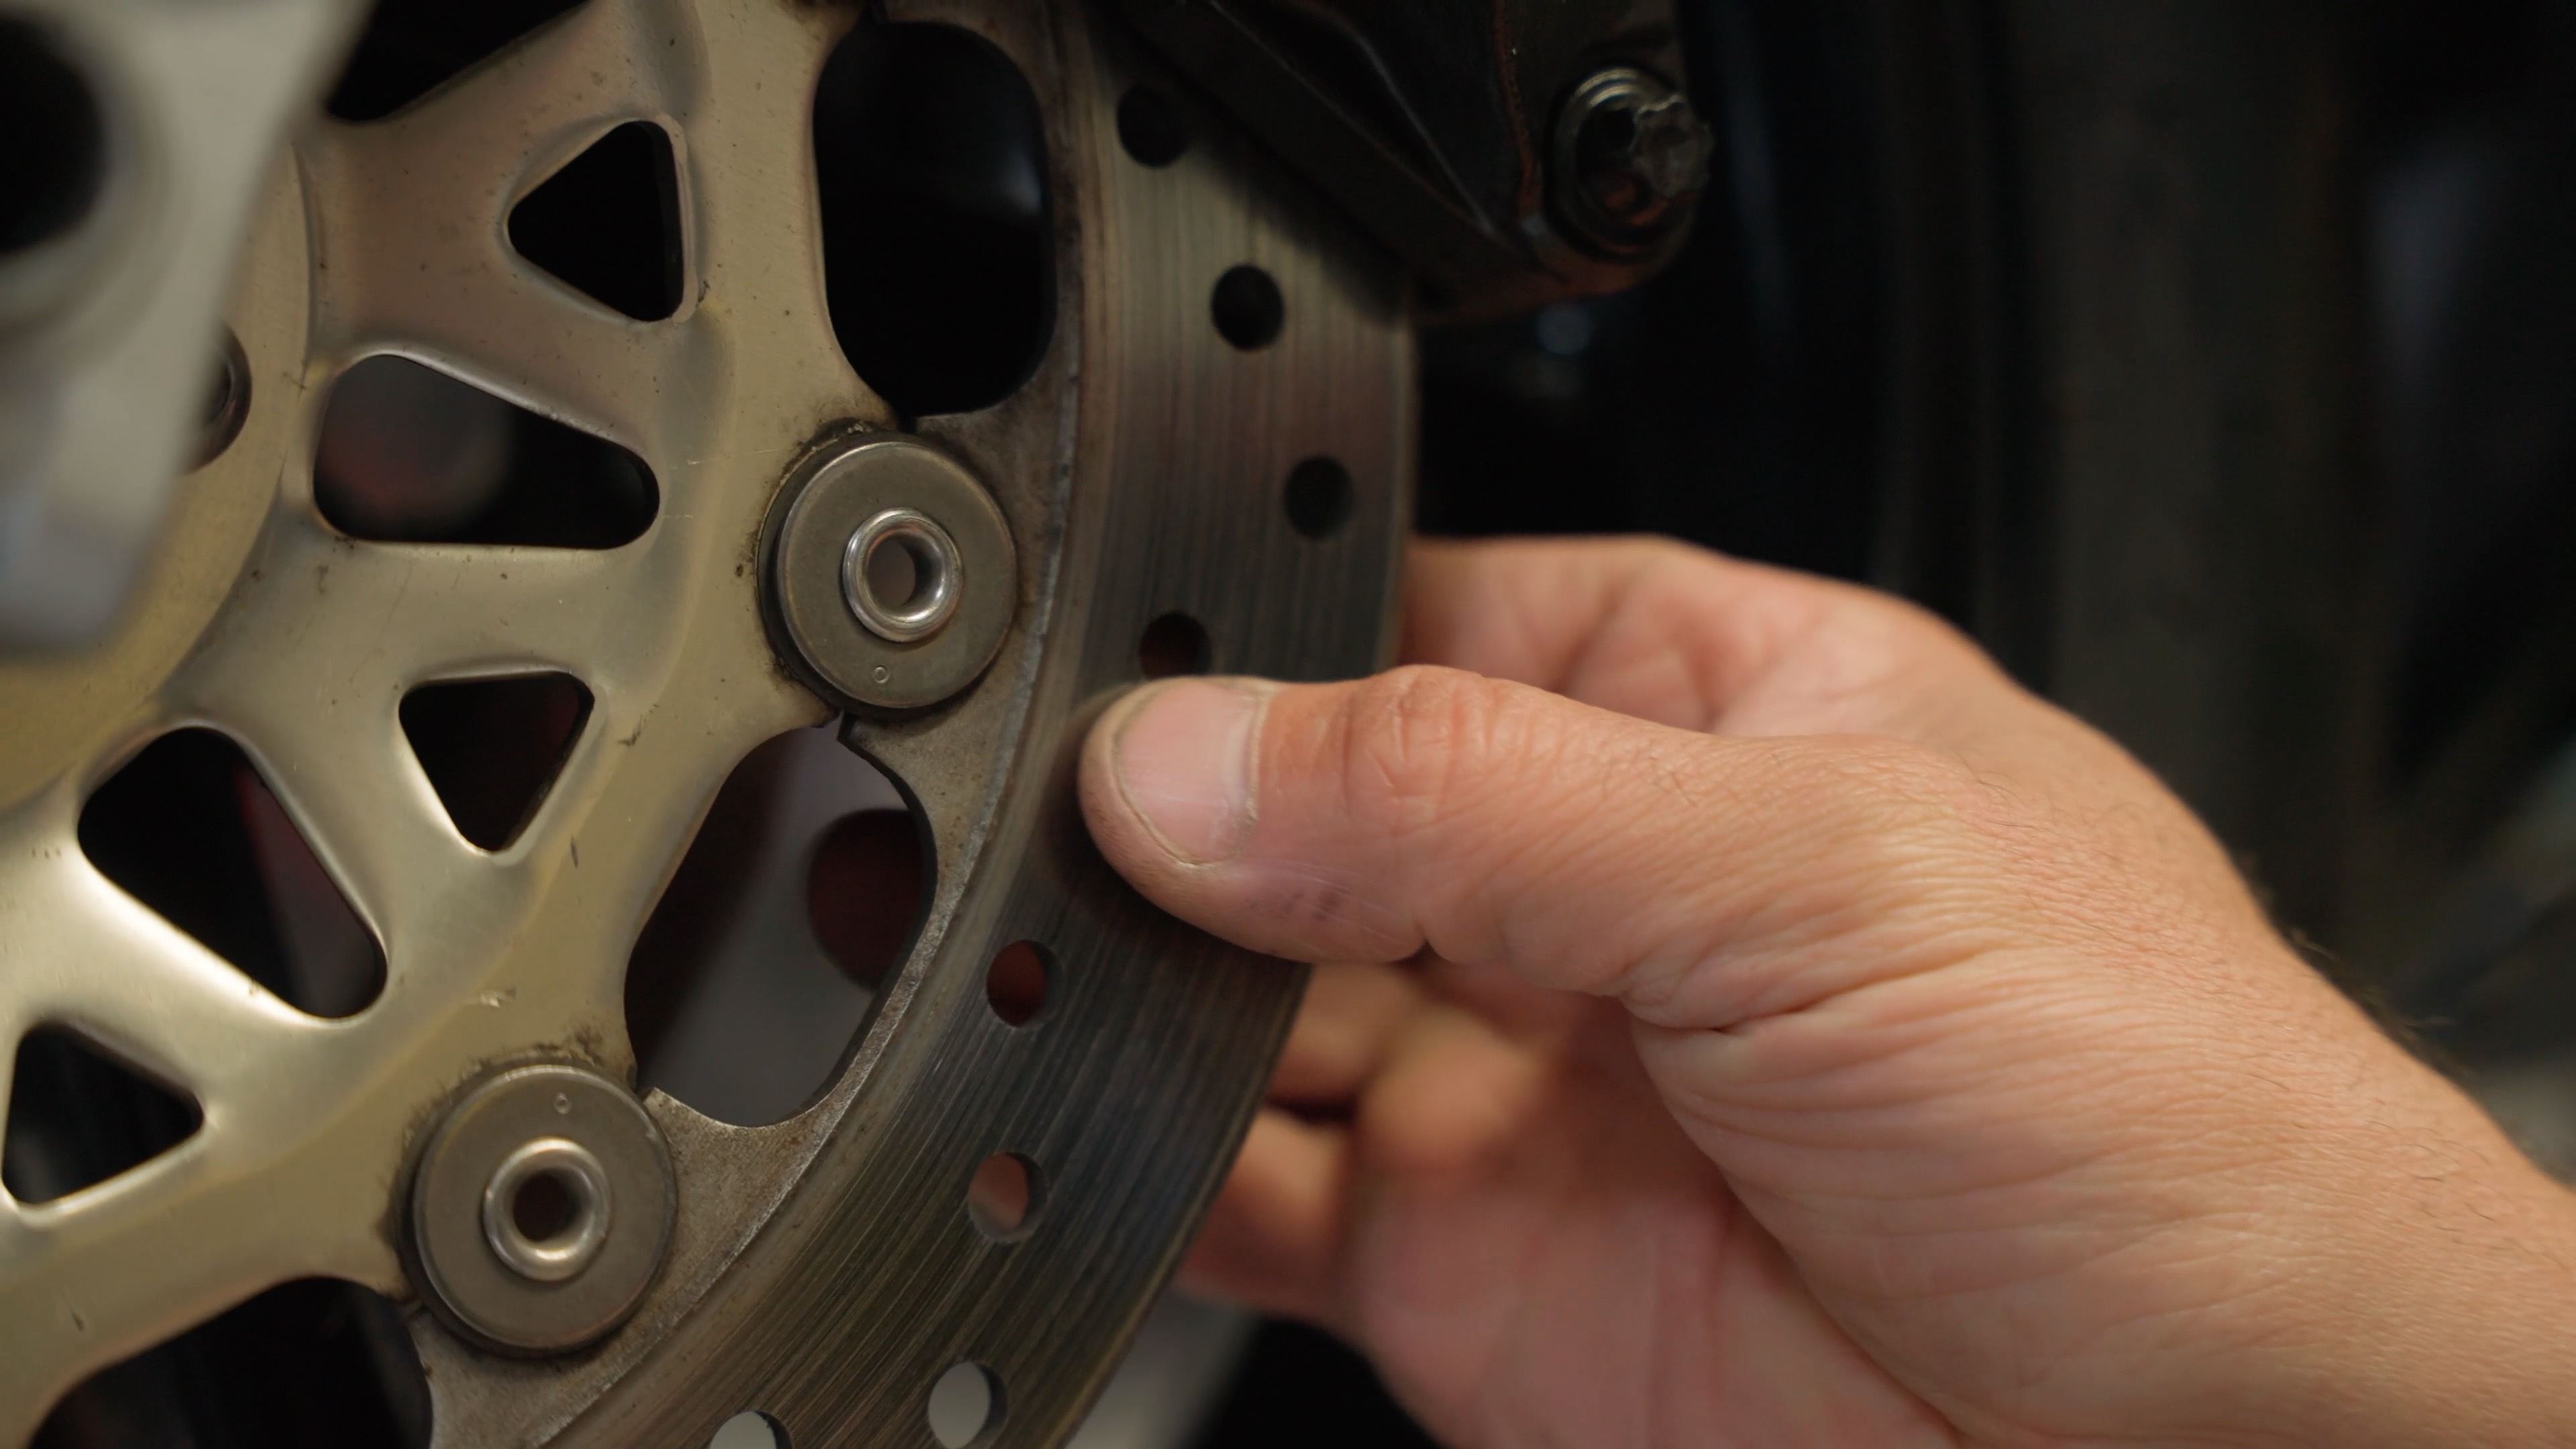
Run your fingers across the disc to check for ridges or a lip.
Calipers
As a whole, brake calipers are reasonably bulletproof, so there’s not much that can go wrong with them other than from crash damage. Having said this, when inspecting, check that the securing bolts are tight; also there should be no residue or leaks around the brake line banjo bolt.
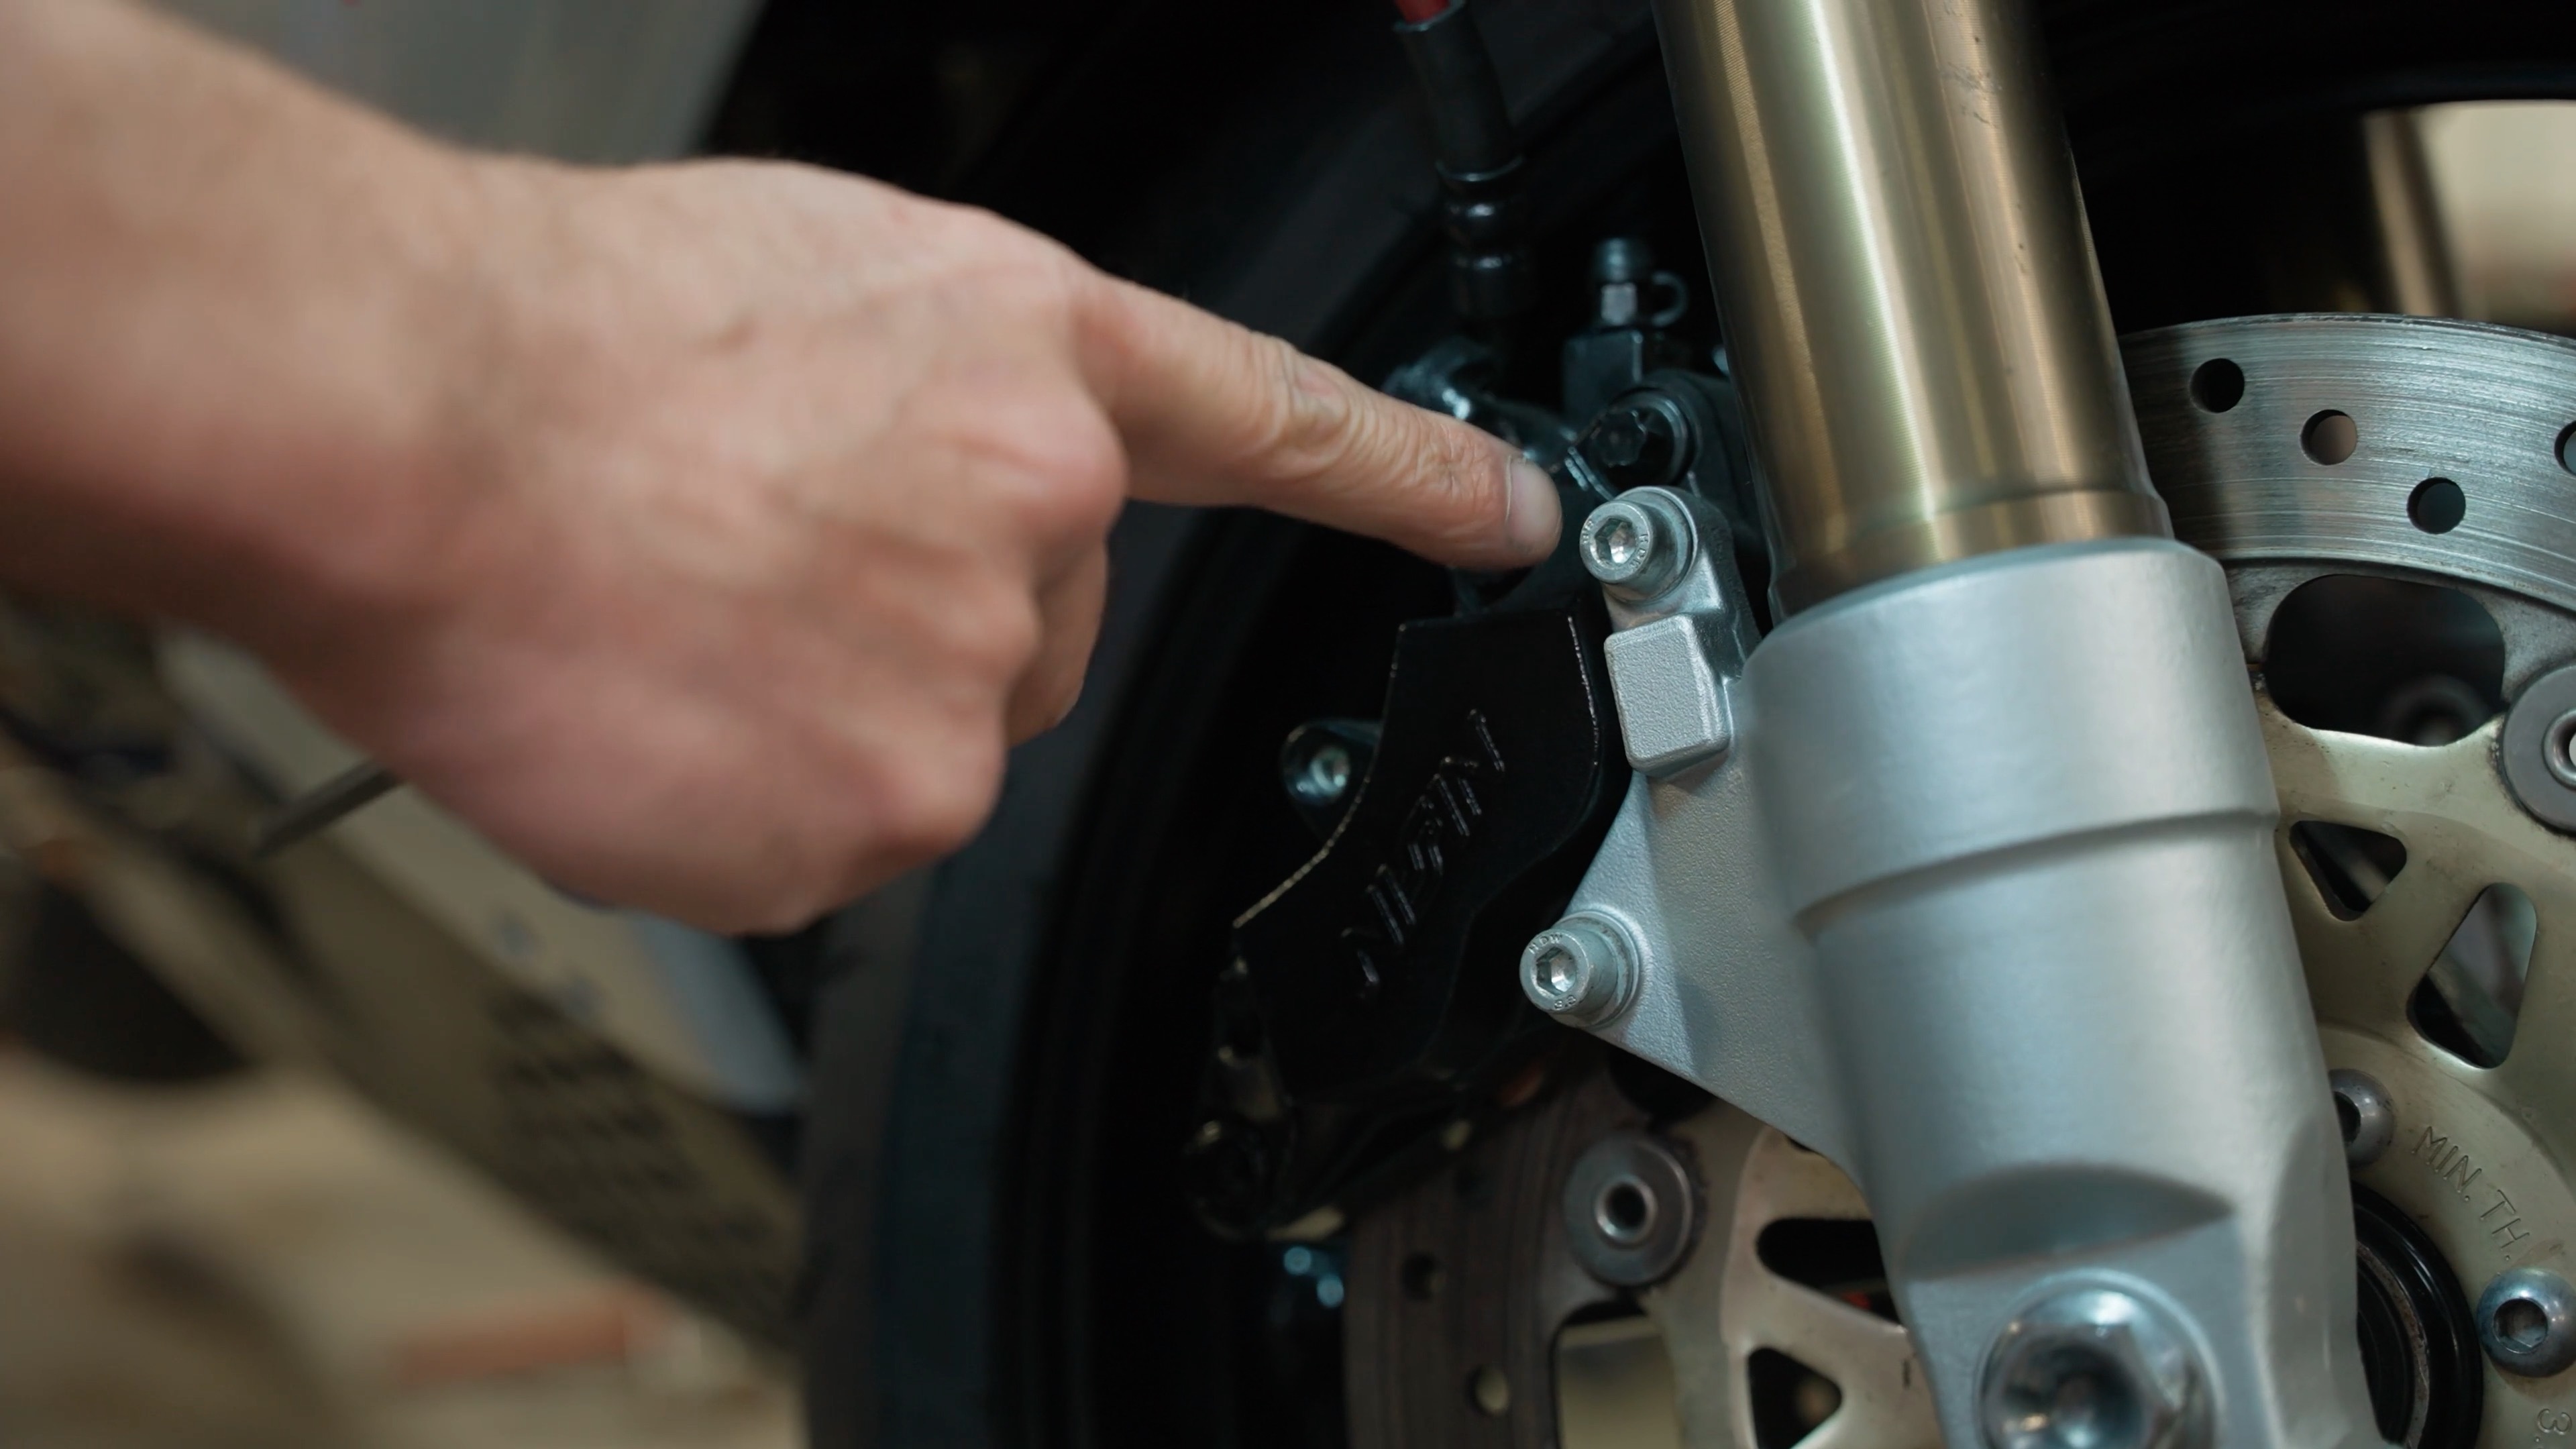
Check that the caliper securing bolts are tight.
The bleed nipple should have a rubber cover and you need to keep the area clean. Most OEM brake nipples are mild steel which can easily rust, making loosening or removing brake line nipples a challenge.
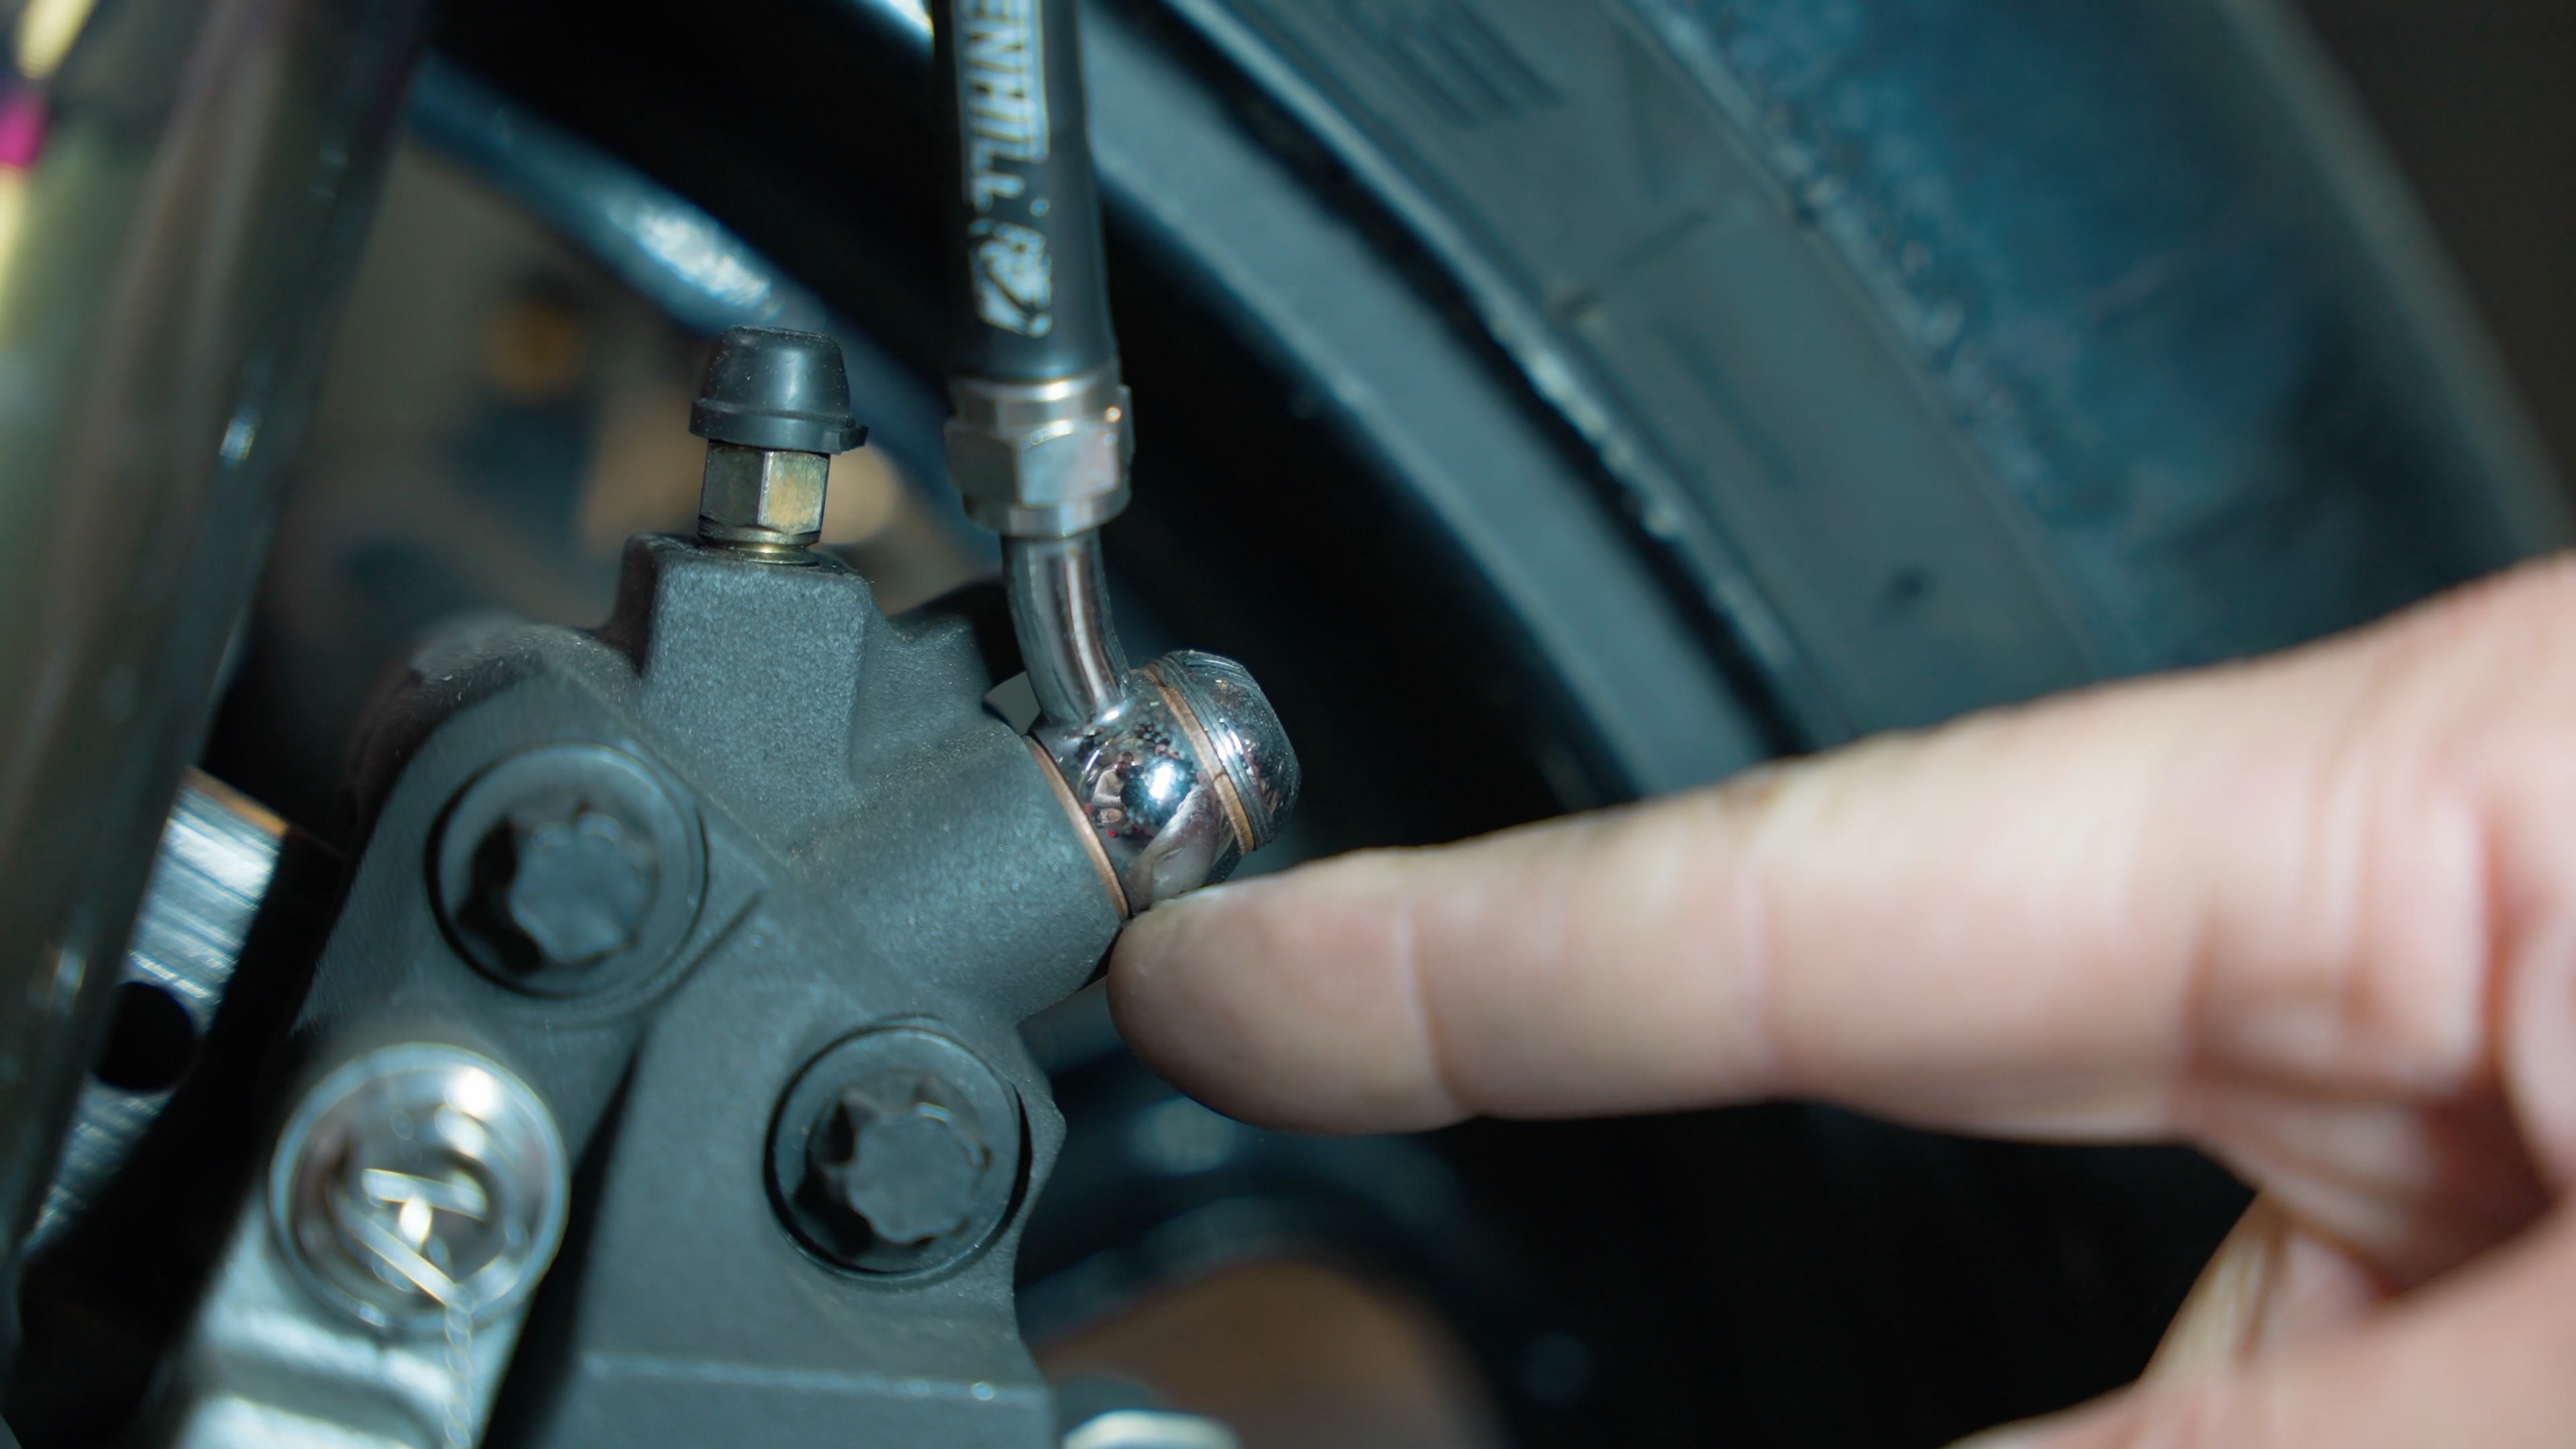
The bleed nipple should have a rubber cover and the immediate area should be clean.
Brake Lines and Fluid
Whether you’re running OEM rubber brake lines or aftermarket steel lines, wipe them clean then check the entire length from the reservoir to the caliper; look for bends, creases, nicks, leaks or chaffing due to the line rubbing on another component. If any part of the brake line isn’t visible behind the steering head or swing arm, keep looking with a torch.
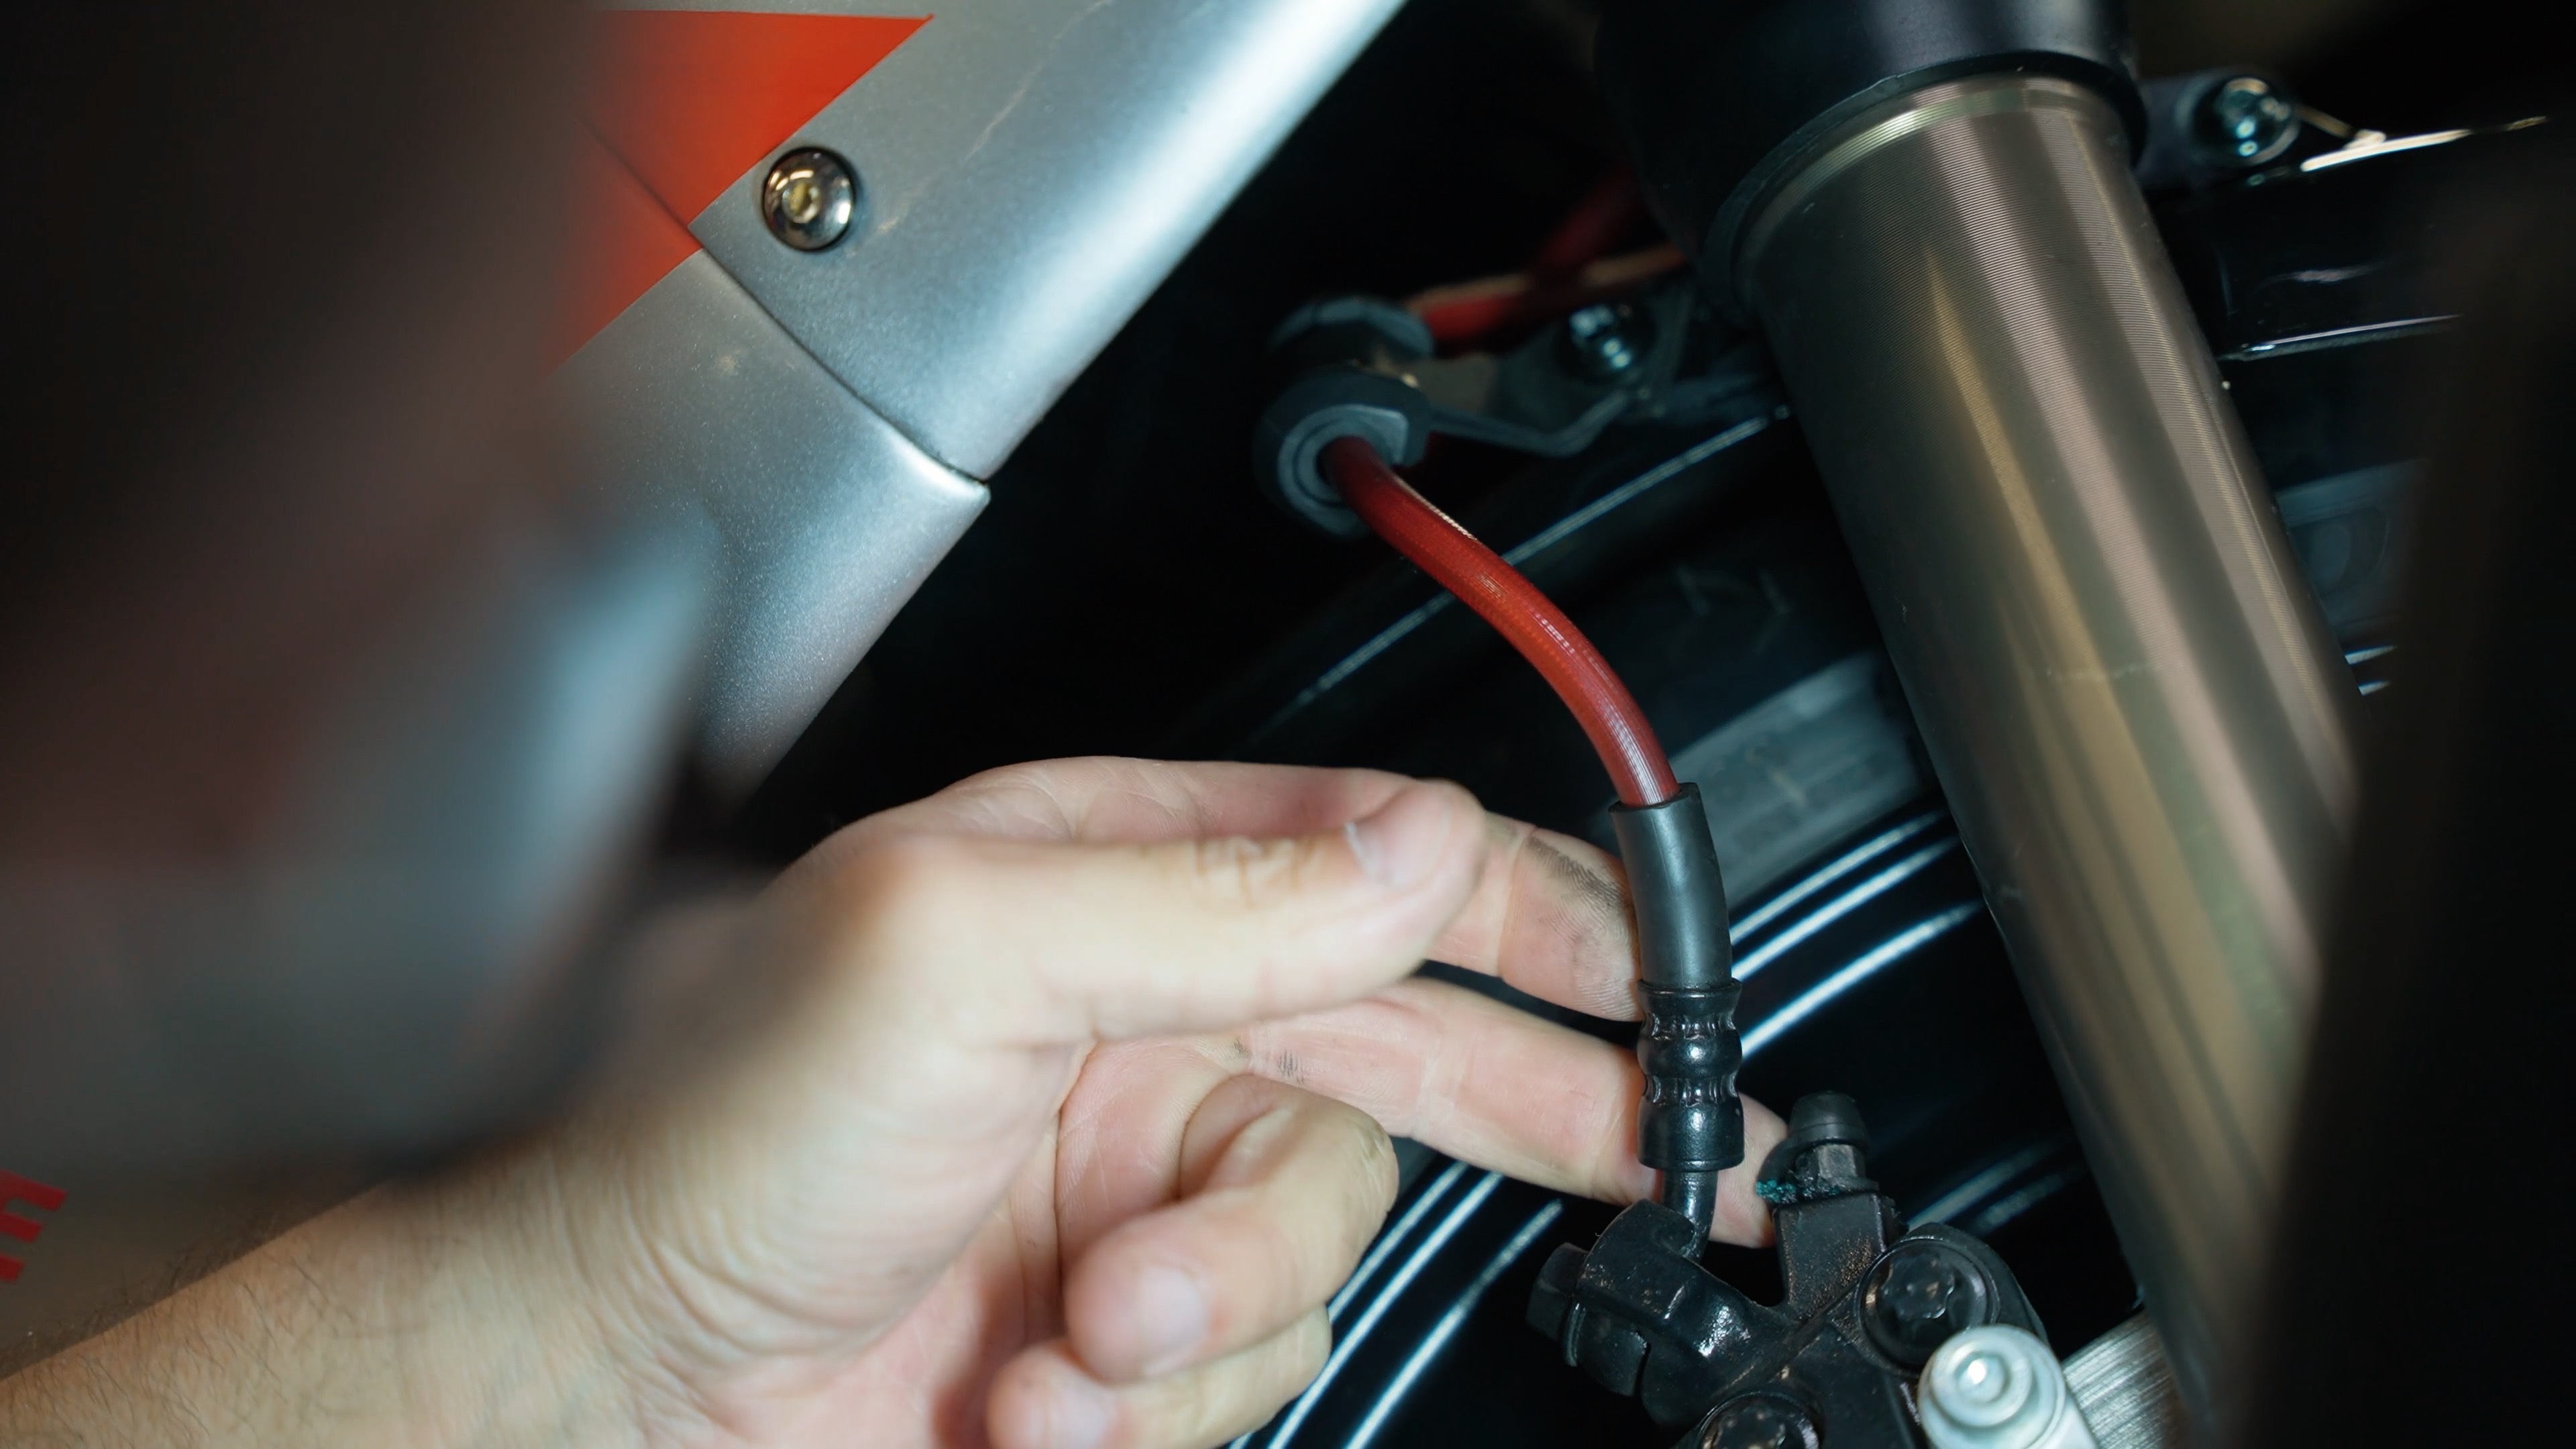
Inspect brake lines for bends, creases, nicks, leaks or chaffing.
Also check the outside of the brake fluid reservoir for leaks or misting. Most modern brake reservoirs have an inspection window to view the upper and lower limit of the brake fluid. This means removing the cap shouldn’t be unnecessary – if you do need to remove the cap, cover the nearby paintwork and clean the reservoir body before opening to avoid fluid contamination.
When checking the brake fluid level, the motorcycle should be upright. If you need to top up, consult the owner’s manual to find the correct grade of brake fluid and remember to flush and renew brake fluid every two years with Bendix dot 3 or dot 4 fluids.
Most times, brake issues are apparent, sometimes though, by the time they make themselves known, it’s already a problem. While some components in the braking system can fail unexpectedly regular inspections are the best way to help keep everything in A1 condition.
To learn more about the Bendix Moto range, visit www.bendixmoto.com.au
For further information:
For more information free call the Bendix Brake Advice Centre on 1800 819 666 or +61 3 5327 0211 from overseas (8am-5pm Monday to Friday EST), e-mail us at: brakeadvicecentre@bendix.com.au or visit our website www.bendix.com.au